

Seared Tuna With Wasabi Pea Crust Recipe

Like David taking down Goliath with a simple stone, you can transform plain tuna into something extraordinary with just a handful of wasabi peas. I know what you’re thinking—wasabi peas as a coating sounds a bit crazy, right? But trust me on this one. This isn’t your typical seared tuna recipe, and honestly, that’s exactly what makes it brilliant. You’ll crush those spicy little green spheres into the most addictive crust you’ve ever tasted, and I’m about to show you exactly how to pull it off without breaking a sweat.
Overview
- Crush wasabi peas into coarse breadcrumb texture and coat 1 lb sushi-grade tuna steaks firmly for maximum coverage.
- Heat oil in cast iron pan until shimmering, then sear coated tuna 45-60 seconds per side for golden crust.
- Season tuna with salt and pepper before coating, then let rest 2 minutes after searing before slicing.
- Recipe creates lean protein dish high in omega-3 fatty acids with impressive presentation and simple preparation steps.
- Serve with sliced green onions and pickled ginger for complete flavor profile and restaurant-quality presentation.
Recipe

This wasabi pea-crusted tuna recipe is one of those dishes that makes you feel like a fancy chef without actually requiring fancy chef skills. The combination of buttery, melt-in-your-mouth tuna with that spicy, crunchy coating is honestly pretty magical. It’s like your taste buds are getting a little surprise party, and trust me, they’re going to be very happy guests. The wasabi peas add this unexpected twist that’ll have people asking what your secret is, and you can just smile mysteriously while secretly knowing it came from a bag of snacks.
I love this recipe because it looks incredibly impressive but takes maybe ten minutes from start to finish. The hardest part is honestly just not overthinking it, which, let’s be real, I tend to do with pretty much everything in the kitchen. The key is getting your pan screaming hot and then just letting the tuna do its thing. You want that gorgeous golden crust on the outside while keeping the inside that perfect ruby red color that makes sushi-grade tuna so special. It’s all about confidence and timing, plus having a really good knife for slicing because nobody wants to massacre their beautiful creation at the end.
Ingredients:
- 1 lb sushi-grade ahi tuna, cut into 4 portions
- 1 cup wasabi peas
- 2 tablespoons sesame seeds
- 2 tablespoons vegetable oil
- 1 tablespoon soy sauce
- 1 teaspoon sesame oil
- 1/2 teaspoon kosher salt
- 1/4 teaspoon black pepper
- 2 green onions, thinly sliced
- Pickled ginger for serving
Cooking Steps

You’ll start by crushing those wasabi peas into coarse crumbs—think chunky breadcrumbs, not powder, because we want texture that’ll actually stick to the tuna and give you that satisfying crunch.
Once you’ve got your tuna coated like it’s wearing a spicy green armor, crank that heat until your oil’s practically dancing in the pan, smoking and ready for action.
The magic happens fast: just 45 to 60 seconds per side creates that gorgeous golden crust while keeping the inside perfectly rare, then you’ll let it rest before slicing because patience, my friend, makes all the difference.
Step 1. Crush Wasabi Peas Coarsely
Most wasabi peas are surprisingly stubborn little nuggets that’ll bounce around your food processor like ping pong balls at first, but don’t let that fool you into thinking they won’t surrender. You’re aiming for coarse crumbs here, not powder – think chunky breadcrumb territory.
The unique texture comes from those irregular pieces that’ll grab onto your tuna like tiny flavor grenades. Pulse in short bursts rather than running continuously, because nobody wants wasabi pea dust coating their kitchen counter. After about eight to ten quick pulses, you’ll have the perfect flavor profile enhancer with just enough bite-sized chunks to create that signature crunch.
Trust me, your patience with these feisty little green rebels pays off beautifully.
Step 2. Coat Tuna With Mixture
Each piece of tuna needs to get completely cozy with that wasabi pea mixture, and honestly, this step separates the timid home cooks from the confident ones. You can’t be gentle here – press that tuna like you mean it.
Roll each piece around the plate, pushing down with your palms to create maximum contact. The texture variation you’re building requires commitment, so don’t worry about being too aggressive. Every surface needs that gorgeous coating, because bare spots mean missed opportunities for flavor balance.
Think of it like breading chicken, but way more forgiving. Pat, press, roll, repeat. Your tuna should look like it rolled through a delicious, spicy gravel pit when you’re done.
Step 3. Heat Oil Until Smoking
With your tuna looking properly armored in that spicy coating, it’s time to get serious about heat, and I mean the kind that makes your smoke detector question your life choices.
Pour that vegetable oil into your heaviest pan—cast iron’s your best friend here—and crank the heat to high. We’re talking proper temperature warfare, folks. The oil needs to shimmer like it’s auditioning for a cooking show, then start producing those telltale wisps of smoke. That’s your green light for ideal searing magic.
Don’t chicken out when things get smoky; that’s exactly where we want to be. The pan should be screaming hot, ready to create that gorgeous golden crust that’ll make your neighbors suddenly very interested in being friends.
Step 4. Sear 45-60 Seconds Each
Now comes the moment of truth, the high-stakes dance between fire and fish that separates the confident cooks from the nervous wrecks. You’ll gently place each tuna piece into that blazing oil, listening for that satisfying sizzle that means your searing technique is spot-on. Don’t you dare move that fish around like you’re making scrambled eggs. Let it sit there, forming that gorgeous golden crust for exactly 45 to 60 seconds.
Temperature variation is your enemy here, so resist the urge to lower the heat when things get smoky. Flip once, sear the other side for the same time, then get it off the heat immediately. That beautiful rare center depends on your restraint, not your patience.
Step 5. Rest Before Slicing
The second that tuna hits the counter, your instincts will scream at you to start slicing, but hold your horses there, chef. Those two minutes of resting time aren’t just a suggestion—they’re your ticket to tuna perfection.
During this ideal resting time, the temperature variation between that gorgeous golden crust and the cool interior starts to balance out, creating the perfect serving temperature. Think of it as letting your masterpiece take a breather after its high-heat workout.
I know it’s torture watching that beautiful fish just sitting there, but trust me on this one. Use these moments to prep your garnishes or grab your sharpest knife. Your patience will be rewarded with slices that hold together beautifully instead of falling apart.
Top Tips
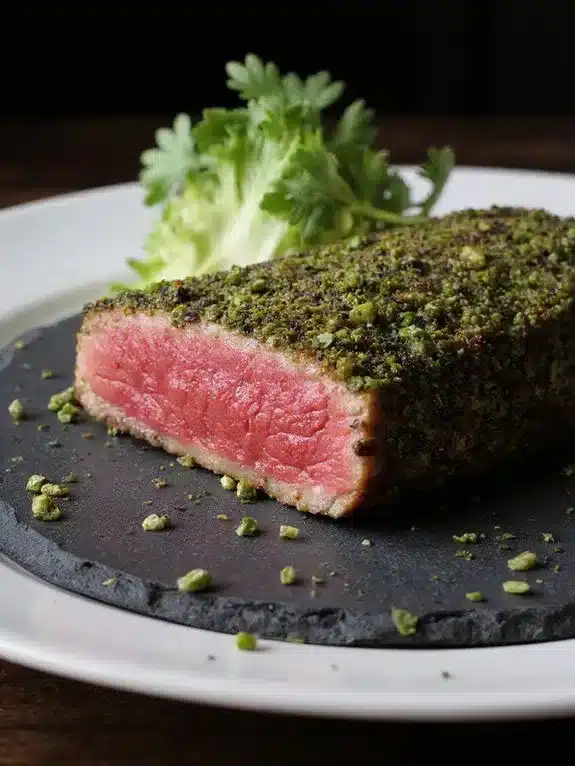
Success with this dish hinges on mastering a few indispensable techniques that’ll make the difference between restaurant-quality results and, well, expensive fish disappointment.
First, trust your thermometer over your instincts. Temperature variation is your biggest enemy here – we’re talking about a 15-second window between perfection and overcooked tuna jerky. I always keep that probe handy because guessing games don’t work with $20-per-pound fish.
Don’t panic if you can’t find wasabi peas. Ingredient substitution saves the day – crushed wasabi-flavored almonds or even regular breadcrumbs mixed with wasabi powder work beautifully. The key is maintaining that textural contrast.
Finally, invest in a truly sharp knife. Dull blades massacre delicate fish faster than you can say “sashimi,” turning your gorgeous creation into shredded disappointment.
Nutritional Guide
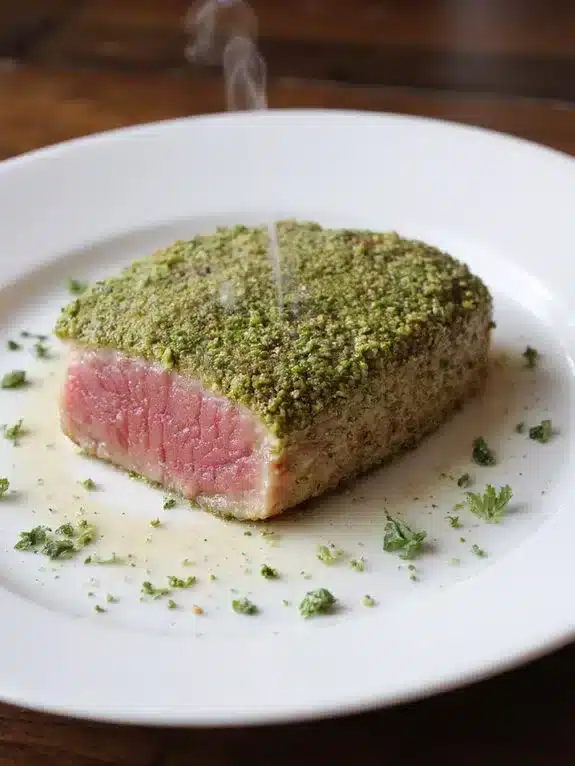
| Nutrient | Amount |
|---|---|
| Calories | 285 |
| Protein | 28g |
| Total Fat | 12g |
| Saturated Fat | 2g |
| Carbohydrates | 8g |
| Fiber | 2g |
| Sugar | 2g |
| Sodium | 650mg |
| Cholesterol | 55mg |
| Iron | 2mg |
| Omega-3 Fatty Acids | 1.2g |
This seared tuna dish provides an excellent source of lean protein and heart-healthy omega-3 fatty acids, making it a nutritionally dense option for those following a balanced diet. The ahi tuna delivers high-quality protein while remaining relatively low in calories, and the wasabi pea coating adds beneficial fiber and plant-based nutrients. The dish is naturally low in carbohydrates and contains minimal saturated fat, making it suitable for various dietary approaches including keto and Mediterranean-style eating plans.
Disclaimer: Nutritional values are estimates and may vary depending on specific brands of ingredients used, portion sizes, and preparation methods. For precise nutritional information, consult product labels and consider using a nutritional calculator with your exact ingredients.
Final Thoughts

Why settle for ordinary tuna when you can transform it into something that’ll make your dinner guests do a double-take? This wasabi pea-crusted tuna delivers everything we crave in a show-stopping dish. The texture variation between that satisfying crunch and silky fish interior creates pure magic on your palate. You’ve got this incredible flavor profile that balances heat, umami, and buttery richness.
The recipe makes you look like a culinary genius without requiring actual genius-level skills. Just remember the golden rule: hot pan, quick sear, sharp knife. Your friends will think you’ve been secretly attending sushi chef school. Trust me, once you nail this technique, you’ll find excuses to make it again and again. It’s that addictive combination of impressive presentation and surprisingly simple execution.
Frequently Asked Questions
Can I Freeze Leftover Seared Tuna for Later Consumption?
You shouldn’t freeze leftover seared tuna since it’ll compromise texture and flavor. The freezing duration degrades quality, and proper thawing methods can’t restore the original delicate consistency you’re craving for.
What Wine Pairings Work Best With Wasabi Pea Crusted Tuna?
You’ll love how dry riesling pairings complement the wasabi’s heat while enhancing tuna’s delicate flavor. Off dry gewürztraminer pairings also work beautifully, as their subtle sweetness balances the spicy crust perfectly for your dinner party.
How Far in Advance Can I Prepare the Wasabi Pea Crust?
Crushed coatings lose 40% crunchiness within hours. You’ll maximize your wasabi pea crust’s shelf life by storing it airtight for up to three days. Ideal storage conditions include cool, dry places—fellow home chefs know fresh coating makes all the difference.
Is This Recipe Safe for Pregnant Women to Eat?
You shouldn’t eat this during pregnancy since it’s served rare. For safe internal cooking temperature, you’d need fully cooked tuna. Consider appropriate tuna portions of well-done fish instead to protect you and baby.
What Are Good Vegetarian Alternatives to Replace the Tuna?
Many plant-based chefs love creating protein-forward dishes with similar textures. You’ll find baked tofu slices or pan seared tempeh steaks work beautifully, giving you that satisfying bite we all crave in elegant presentations.
Printable Recipe Card
Want just the essential recipe details without scrolling through the article? Get our printable recipe card with just the ingredients and instructions.


